Tutorial for using Bitbrowser with MaxProxy
时间: 2023-07-21 11:31 点击:
There are two ways to configure the MaxProxy proxy IP, also known as MaxProxy, to the BitFingerprint browser:
The first one is the same as the 911s5 proxy, and it is realized through the proxy IP+port forwarding mode. Those who have used the 911s5 proxy can easily understand the configuration.
The second is to directly obtain the IP information mode in the MaxProxy proxy software, and directly copy it to the proxy settings of each bit fingerprint browser.
If you want to open 10 Bitbrowser profiles at the same time, configure 10 IPs for 10 ports in the MaxProxy proxy software. The dynamic IP and static IP configuration methods of the MaxProxy proxy are the same, and both have the above two configuration modes (port forwarding and IP acquisition).
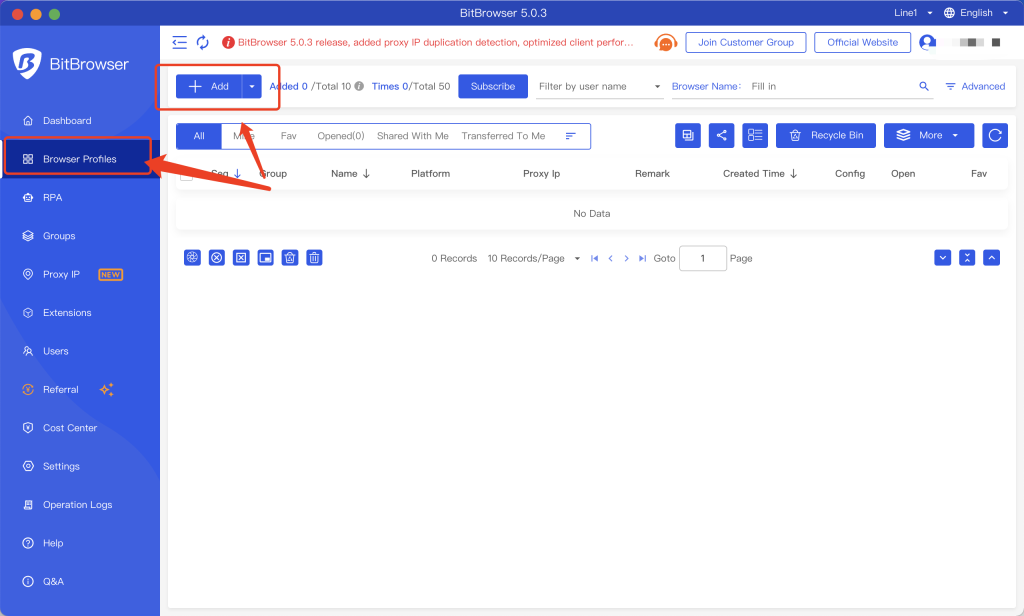
1.On the home page of the BitFingerprint browser software, click [Create a new browser]
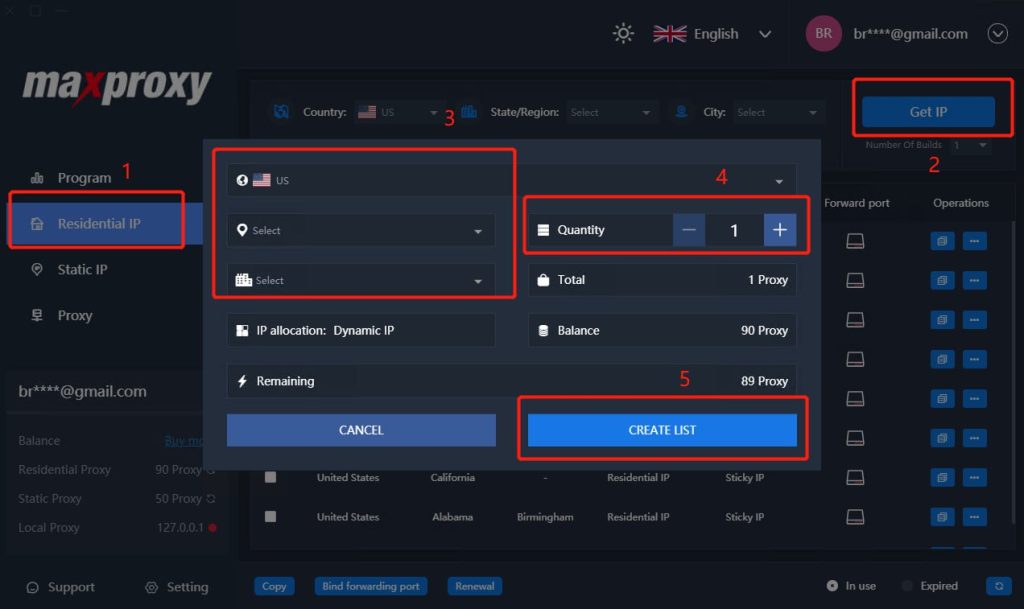
2.Generate proxy IP on demand in MaxProxy proxy:
[Obtain IP from dynamic IP or static IP in MaxProxy software]
Select [Dynamic IP] or [Static IP] tab as required;
Click the [Get IP] button;
Select the desired country and city;
Select the number of proxy IPs that need to be placed, here is an example of buying 1;
Click the [Order] button to complete the purchase of proxy IP.
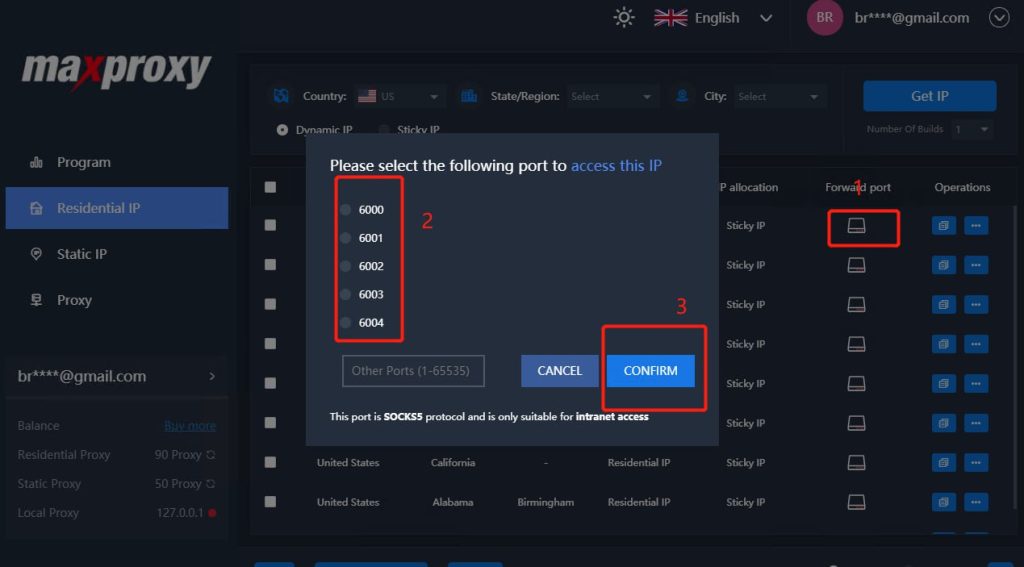
【Proxy IP+Port Forwarding Mode】
Click the [Forward Port] icon in the proxy IP list;
Select a port and assign the proxy IP to this port;
Click the [OK] button.
You can go to the Proxy tab to see which proxy IP is assigned on the port
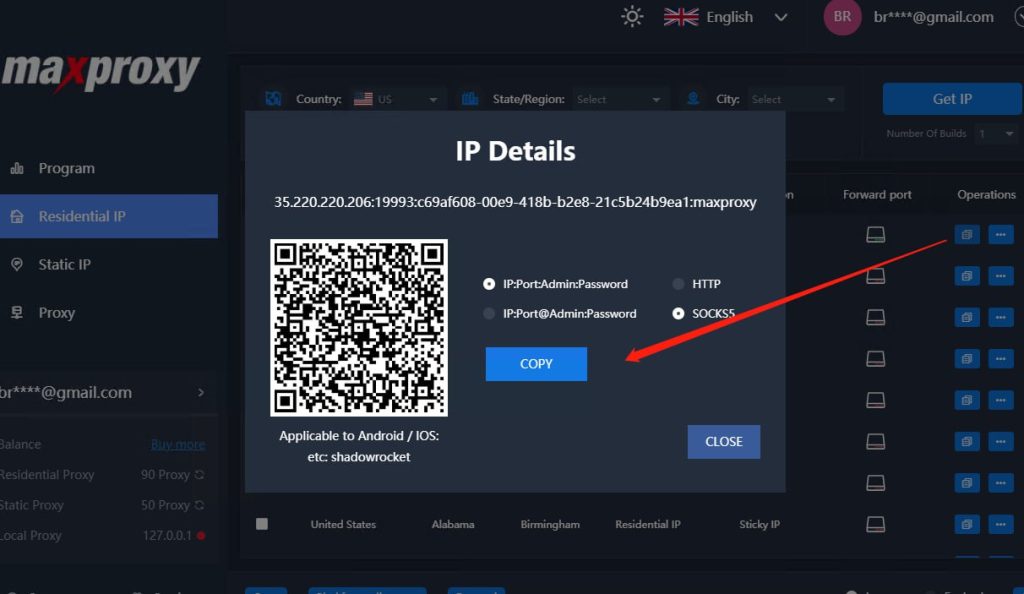
[Direct access to IP information mode]
Click the [Copy] icon in the operation field in the proxy IP list;
Click the [Copy] button to copy a proxy IP (here you can choose the arrangement of IP information and choose HTTP or SOCKS5 protocol as needed);
3. Configure the MaxProxy proxy IP to the bit fingerprint browser:
【Proxy IP+Port Forwarding Mode】
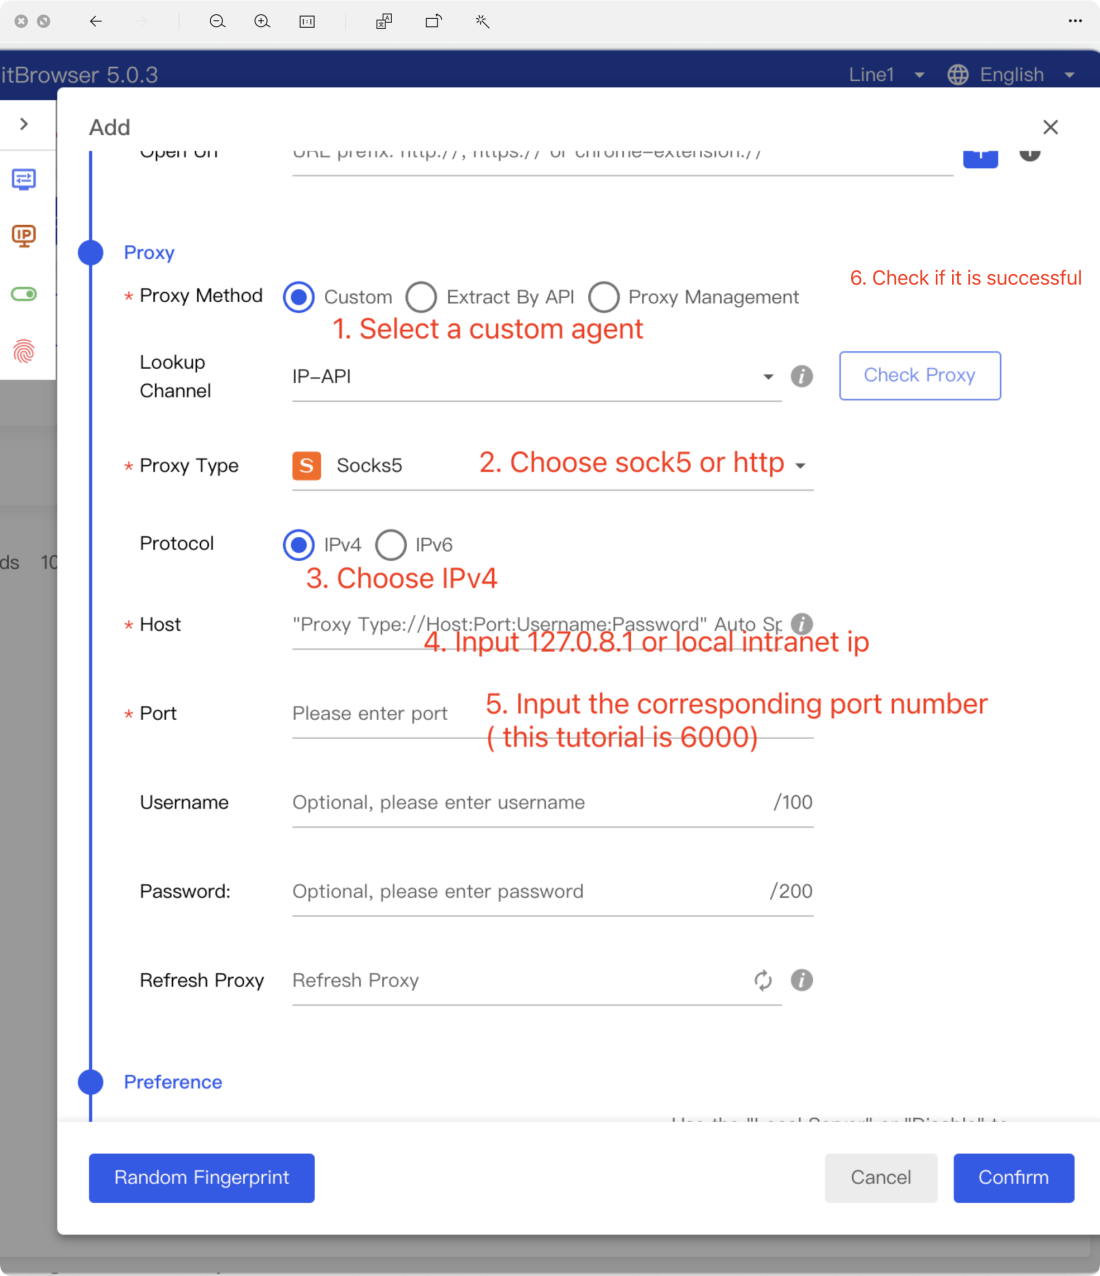
Create window—proxy settings (newly created browser: click the fingerprint icon next to the open button—proxy settings);
Proxy type: Select SOCKS5, depending on which proxy type is selected when extracting IP from the MaxProxy proxy;
Proxy host: enter 127.0.0.1 (if the MaxProxy proxy software and the bit fingerprint browser are on the same computer, if not, enter the local area network IP address of the machine. The local area network IP address can be seen in the Local Proxy of the MaxProxy proxy software interface. The local area network IP address of this tutorial is: 192.168.186.234);
Proxy port: Enter the corresponding port number (this tutorial uses 6000 as an example);
Proxy account: leave it blank and do not enter;
Proxy password: leave blank and do not enter;
Click [Check Proxy] to check whether the proxy IP configured in the network is successfully connected. If there is specific IP information displayed, the connection is successful, otherwise, the connection fails;
Finally, click [OK] to configure successfully.
[Direct access to IP information mode]
Create window—proxy settings (newly created browser: click the fingerprint icon next to the open button—proxy settings);
Proxy host: Select SOCKS, depending on which proxy type is selected when extracting IP from the MaxProxy proxy;
Proxy host, proxy port, proxy account, proxy password: copy the IP information in the MaxProxy proxy, click on the proxy host input box of Bit Browser to paste the proxy information
Click [Check Proxy] to check whether the proxy IP configured in the network is successfully connected. If there is specific IP information displayed, the connection is successful, otherwise, the connection fails;
Finally, remember to [OK] to let the configuration take effect.

4.Configure more MaxProxy proxy ports:
If the number of port forwarding is not enough, in the system settings of the MaxProxy proxy software, enter a larger port number range for the forwarding port